SSD is a digital information recording device based on flash memory chips, which implies the absence of mechanical elements. High performance, a fairly high price and a limited number of rewrite cycles are the main differences between SSDs and magnetic platter drives. The last feature primarily excites the minds of owners of solid-state drives or those who are planning to purchase such a device to install Windows 7 or 10 x64 on it in order to improve the performance of the computer. This procedure is practically no different in both systems. Therefore, we can equally assume that the SSD setup in Windows 7 is absolutely identical to Windows 10.
In this article, we will look at how to set up an SSD, install an operating system on it, and configure some Windows 7 or 10 parameters to extend the life of such a drive. The fact is that the “seven” or “ten” during operation repeatedly accesses the system partition not only to read some files, but also writes temporary files to the disk, a paging file, and performs indexing. These and other similar actions will use up the working resource of the SSD at a significant rate and the disk will wear out faster than expected.
Transferring temporary files
The “Temp” directory is a directory for storing files with intermediate calculations during the operation of Windows 7 or 10. This service folder must be transferred to the hard drive after the installation of Windows 7 or 10 is completed. This action will slightly slow down the computer, which will be beneficial for the user virtually invisible, but will increase the service life of the SSD.
This is done as follows:
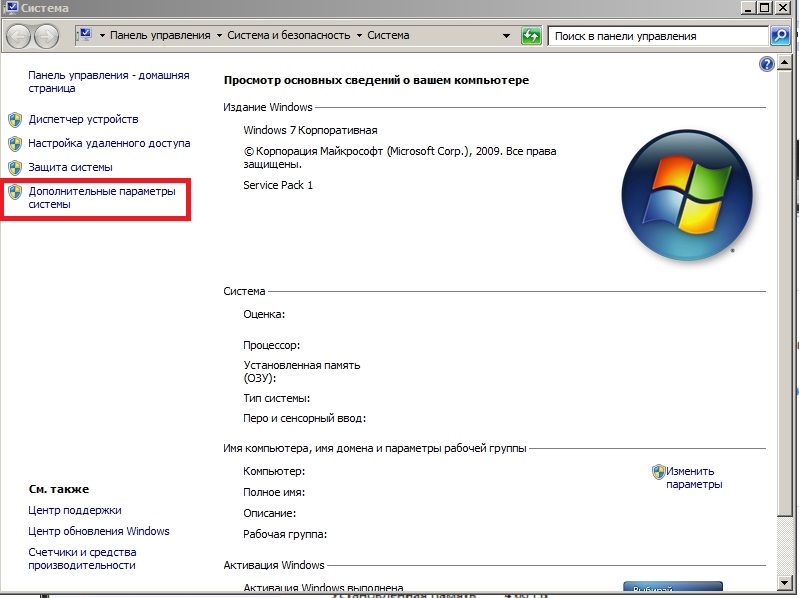
- Go to the context menu “My Computer” and call it “Properties”. Or right-click on the "Start" button and select "System" from the drop-down menu.
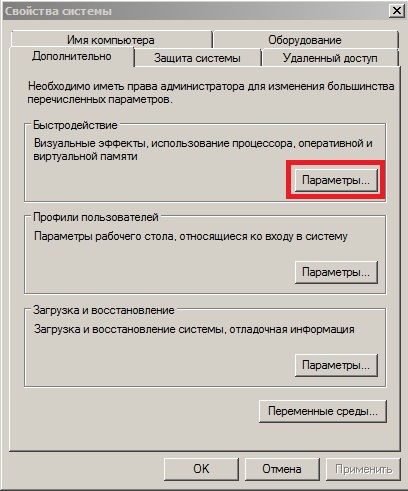
- In the left frame, click on the “Advanced Settings” tab.
- Go to the "Advanced" tab and click on the "Environment Variables ..." button, as in the screenshot.
- Next, new values of environment variables are set.
- Select the “Temp” directory and click “Change”.
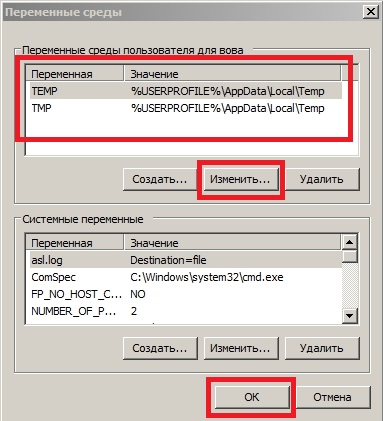
- In the "Default" line, set the full path to the directory where temporary files will be stored. It is recommended to transfer them to the disk that is first in the list of HDD partitions.
- We do the same for the “Tmp” directory.
From now on, the magnetic disk will store the service files of Windows 7 or 10 x64, saving the SSD from unnecessary wear.
Disabling sleep mode
Sleep mode or hibernation - shutting down the computer while writing the contents of RAM to the system disk in the hiberfil.sys file. This mode gives you the ability to quickly turn on a Windows 7 or 10 PC. For computers with a large amount of memory (8 GB or more), this SSD wear factor becomes even more relevant. In order to avoid unnecessary overwriting of unimportant information on a solid state drive, the operating system must be properly configured. For the sake of increasing the life of the drive, it is worth abandoning hibernation, especially since 7 or 10 already starts instantly.
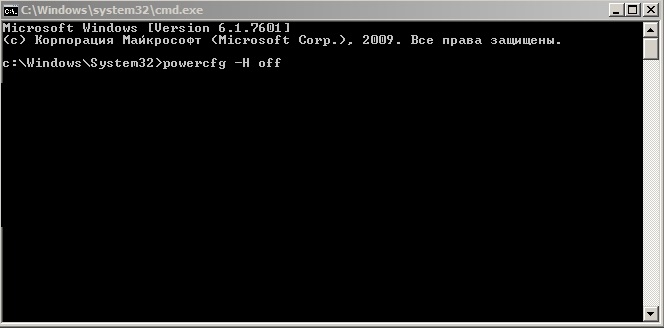
- Hibernation is disabled by the "powercfg -H off" command entered into the command line launched with administrator privileges.
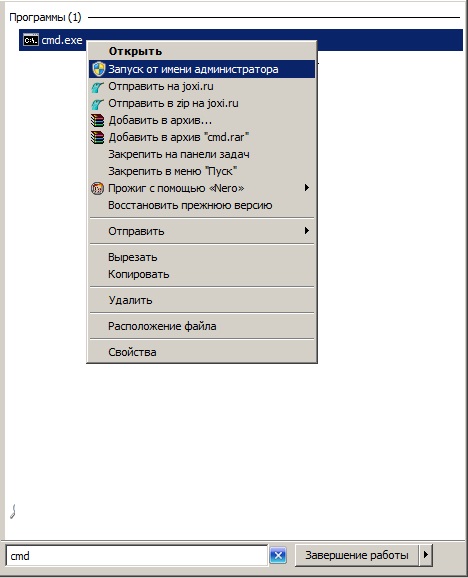
- It is launched through the "cmd" command in the Start search bar or through the desktop context menu.
Disabling the page file
The swap file is used by Windows 7 or 10 to write little-used data in the event of a lack of RAM until it waits for its turn. The speed of information exchange between HDD and RAM depends on many factors, but is significantly inferior to the operating time of RAM. The paging file not only slows down the work on a PC with a small amount of RAM, but also requires repeated writes to the solid-state drive .
If you want to extend the life of an SSD on Windows 7 or 10, disable the page file (it’s better to buy a stick of RAM, it will never be superfluous). To get maximum speed from your computer, you will have to sacrifice the working resource of the drive.
Disabling the paging file is done as follows.
- Go to “Advanced parameters”, as in the previous method.
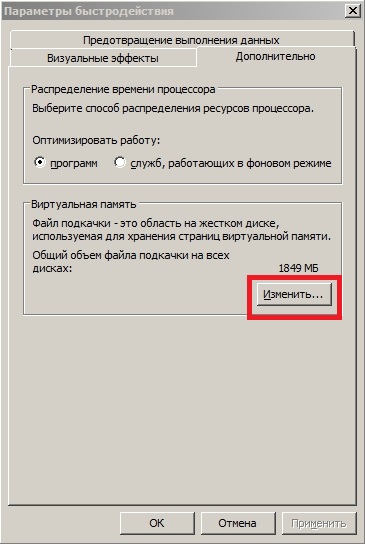
- In the “Performance” tab, click on the “Options” button.
- In the tab, as in the screenshot, click “Change”.
- Uncheck the “Automatically select...” option.
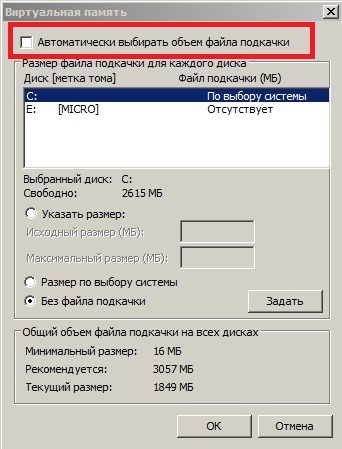
- Move the trigger switch to the “No paging file” position,
- If you want to use a swap file, select the HDD partition, preferably the first one, and set pagefile equal to the amount of installed RAM.
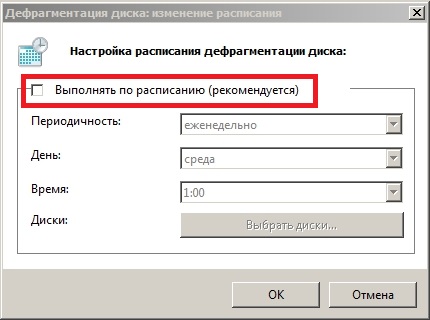
Disable drive optimization
Defragmentation is the process of collecting fragments of a file scattered over the surface of the media into one piece. Fragmentation is carried out during the writing of information to the disk due to the imperfection of the NTFS file system. A high degree of fragmentation negatively affects the performance of the drive due to the fact that the reading magnetic head has to make significantly more movements than if the file fragments were in neighboring clusters. But on an SSD, document fragmentation has practically no effect on performance, therefore it is not recommended to defragment it and it is necessary to turn off scheduled defragmentation (configuring and disabling SDD defragmentation in Windows 10 happens automatically).
- Go to the properties of the SSD disk and go to the “Service” tab.
- Click “Run defragmentation”.
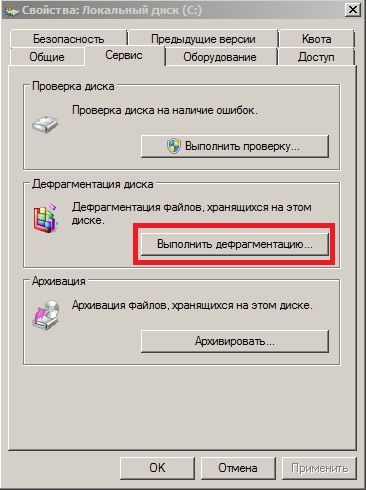
- Click “Set up schedule” and uncheck the box next to “Run according to schedule.”
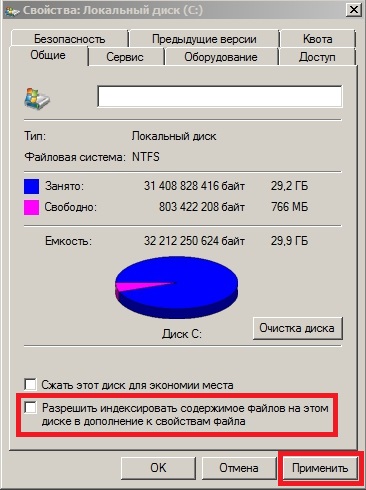
Indexing
Indexing is the procedure of entering data about files stored on disk into a special list called an index. This data is needed to search for information on a PC with Windows 7 or 10. If hundreds or thousands of personal files are not stored on your SSD and the need to search for something on the disk rarely arises (for this you can use the functionality of Total Commander or other applications), it is reasonable to deactivate indexing. This will slightly reduce the number of accesses to the drive in write mode. The setup is performed as follows.
- Select the disk and select “Properties” from the context menu.
- Uncheck the box next to “Allow indexing...”, as in the screenshot.
Program cache
Many applications, such as Internet browsers, use data caching to quickly access it next time. The situation here is the same as with the swap file and temporary directories: if you want maximum speed, sacrifice the SSD resource, the storage is expensive - transfer the cache or install the browser itself on your hard drive .
As an option, use the free amount of RAM to create a RAM disk on which the browser cache and other programs will be stored. Setting up and creating such a disk is a simple process, but it looks different for each application, which is beyond the scope of our article.
Restore points
We disable the creation of rollback points in Windows 7 or 10, which will also have a positive effect on the service life of the SSD.
- To do this, go to “Properties” of the “My Computer” directory.
- In the “System Protection” tab, select the system drive and click configure.
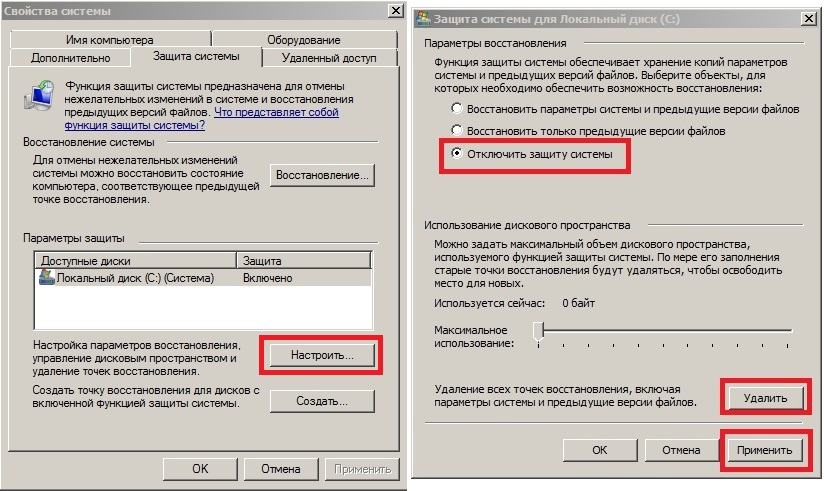
- Move the switch to the “Disable system protection” position, click “Delete” and save the changes.
Simplifying the setup process
When using the SSD Mini Tweaker, setting up Windows 7 or 10 to use a solid-state drive is carried out in several steps.
- Download, install and launch the application.
- Checking the boxes next to unnecessary options is done using the knowledge gained above.
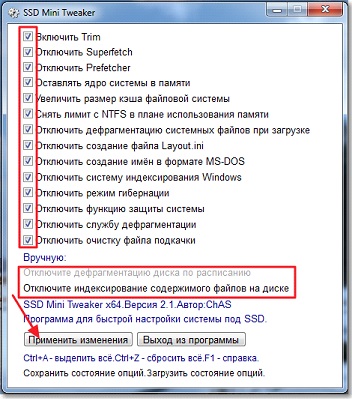
- Click “Apply changes”.
- Setting new parameters will take effect after rebooting the PC, so we restart the system.
Setting most of the parameters in SSD Mini Tweaker is done manually, but through the program, settings windows open with one click.
(Visited 11,681 times, 1 visits today)


