Complaints that there is no sound on Windows 7 can be heard from many users of this operating system. People complain that there may be no sound at all or disappear periodically, appearing after restarting the computer or even without it. Therefore, it is necessary to consider the main reasons due to which this phenomenon is possible.
Mechanical problems
These issues include:
- Incorrect connection of the speakers or some kind of malfunction in their work. For example, the user can connect the speakers to the wrong connector or forget to connect them at all. If they are properly connected, it is worth checking the sound with other speakers or headphones. Maybe the speakers are not working.
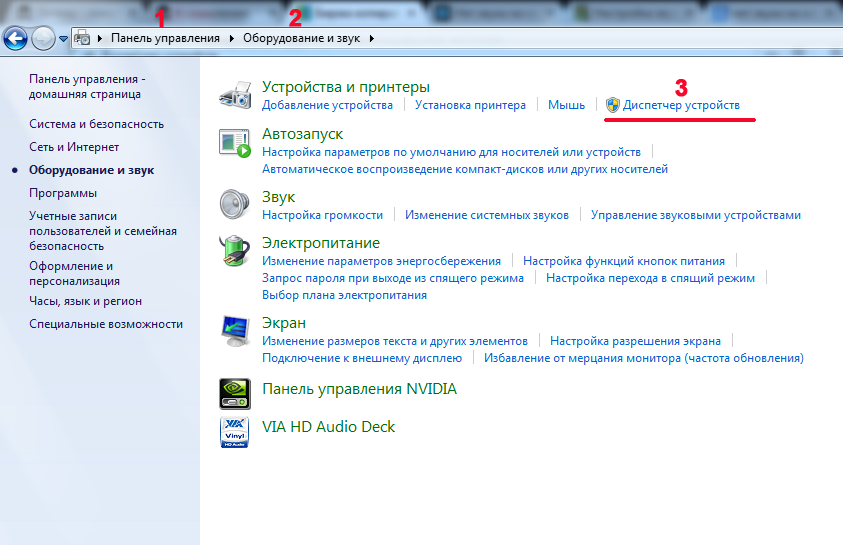
- No sound card. Modern motherboards are equipped with a built-in sound card. But if it is not there, you need to purchase this device and install it on the motherboard. To check if there is a sound card, you need to open the device manager by going to "Control Panel" - "Hardware and Sound" - "Device Manager".
In the device manager under Windows, in the list of all installed devices, there is an item "Sound, video and game controllers". Before the name of the item, there is a small triangle on the left. If you click on it with the mouse, a list of installed devices belonging to this category will open.
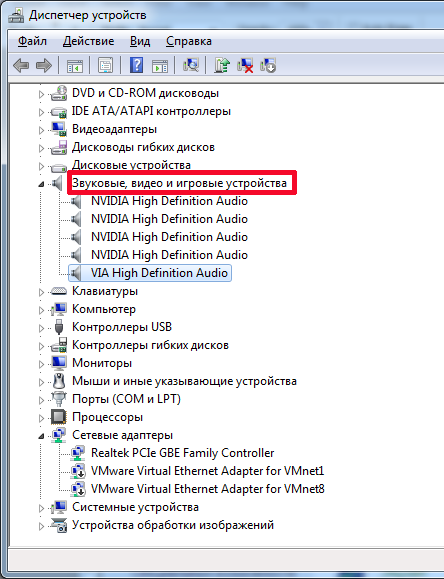
The screenshot shows that the sound card is installed, otherwise it would not be in the list.
Solving a problem with drivers
Also, the sound setting in Windows 7 may not be available if there are no drivers for the sound card. For most integrated sound cards, the operating system has built-in drivers. However, for some of them, the system does not find a suitable driver, so its installation is required. If there is no driver in the device manager in the corresponding category, the sound card will be defined as an unknown device, and a yellow question mark will be displayed next to the name. This icon indicates that there is no suitable driver for the device.
You can find it on the disk attached to the computer, which comes with the PC upon purchase. However, a driver disk is not always available. Many laptops are sold without drives. Or the user could buy a used computer, and the previous owner did not find the drivers. In this case, you need to go to the manufacturer's website, where you should download the driver package, and then install them manually.
There is also such a problem in Windows when the sound disappears when the drivers are installed. This is usually due to an outdated driver. In this case, it needs to be updated. For this:
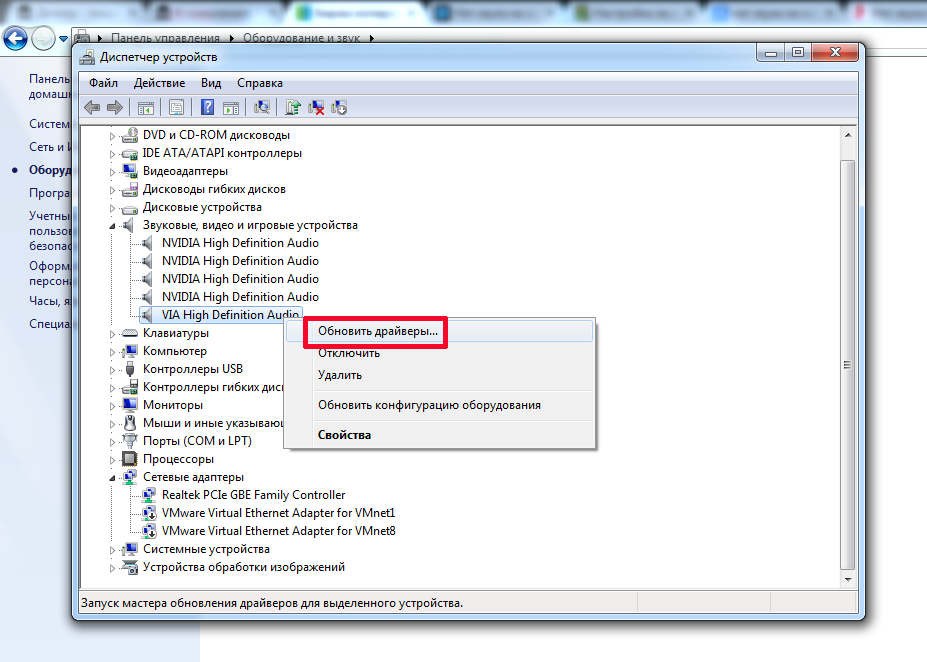
- Open device manager.
- Select a sound card from the list.
- Right click on its name.
- In the menu that appears, click "Update drivers ..."
After that, a window appears in which it is better to select automatic search so that Windows searches for drivers not only on the local computer, but checks on the Internet.
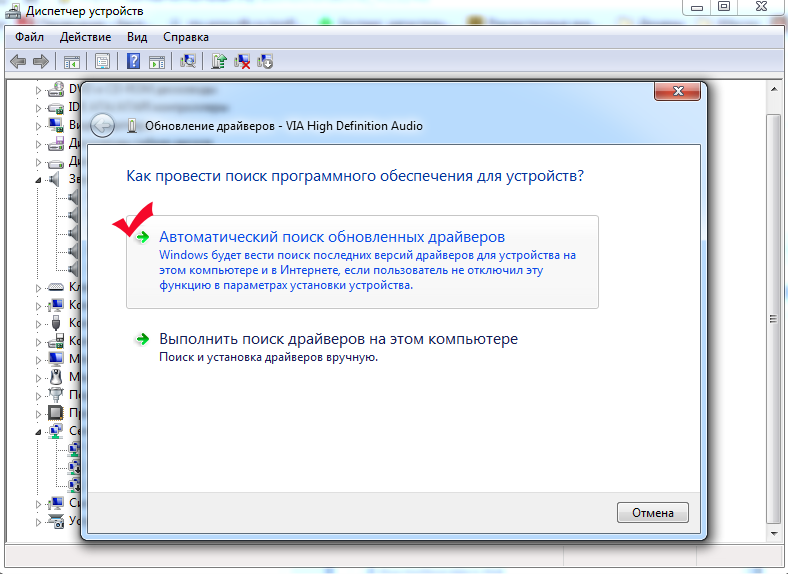
The operating system will search for new driver versions. If found, they will be installed on the computer. If there are no updated versions, a corresponding message will be displayed.
How to set up sound?
If the speakers are properly connected and the latest drivers are available, the lack of sound may indicate a system mute of sound devices. In this case, sound settings in Windows 7 are carried out through the control panel. To do this, go to the "Control Panel" - "Hardware and Sound" - "Sound".
Sound devices should appear in the window that appears. If they are not, then they are simply disabled.
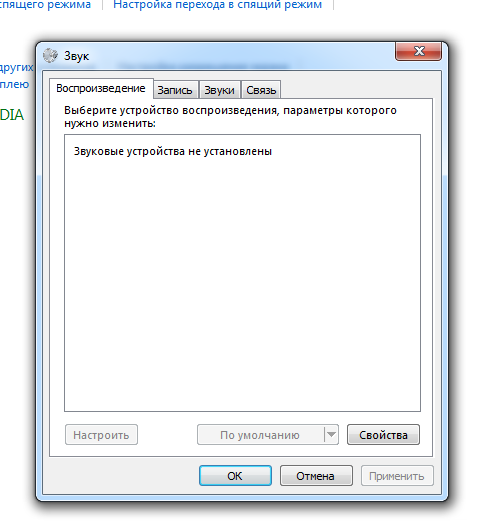
To display disabled devices, right-click in the box where the devices should be listed and select "Show disabled devices" from the menu. After that, Windows will display the devices available on the system that have drivers installed.
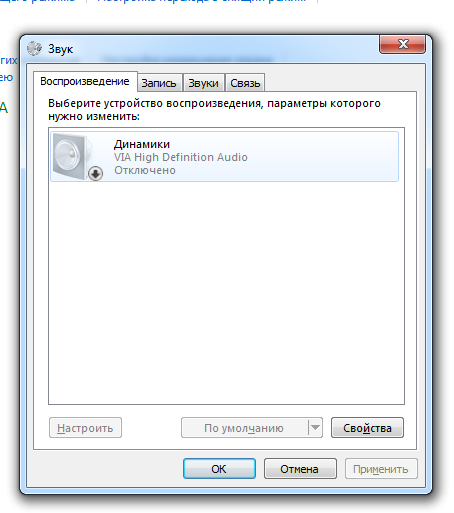
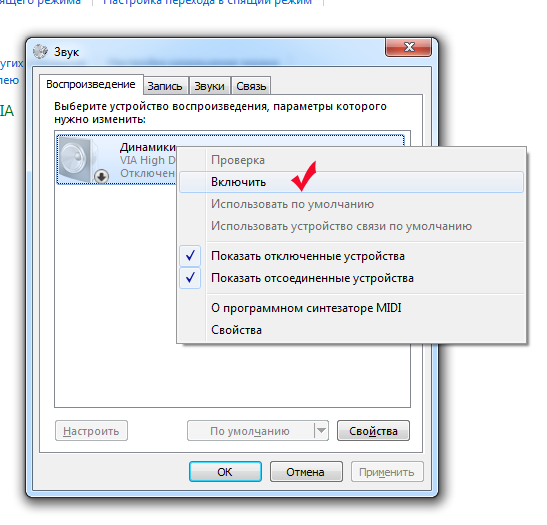
The screenshot shows that the device is displayed in gray, that is, it is not currently used. This is also indicated by the inscription "Disabled" under its name. So it should be connected. For this you need:
- right click on the name;
- select "Enable".
After such manipulations, the device will be displayed in green, and the inscription "Disabled" will disappear. To immediately check whether it was possible to adjust the sound or not, you can right-click on the device and select "Check".
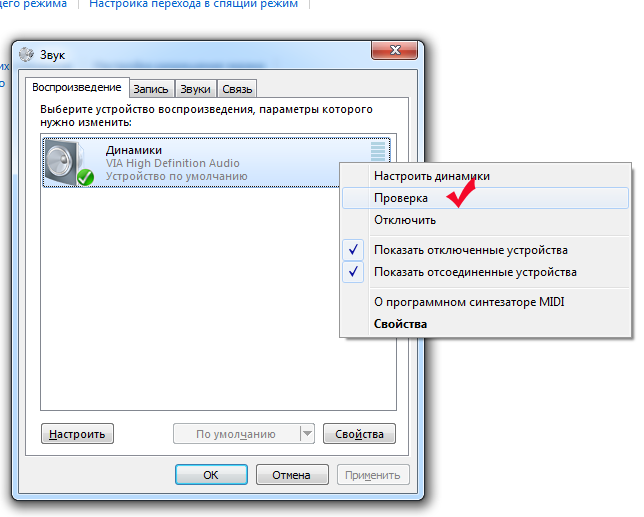
If the speakers work, a beep will sound, which means the setting was successful. Finer sound quality settings can be made by clicking the "Properties" button in the window with the displayed speakers. However, configuring using standard Windows tools does not allow achieving the desired audio quality; for this, utilities are used that are designed to work with a sound card of a particular model. Such a utility can be found on the driver disk or on the Internet, on the manufacturer's website.
Windows Audio crashes
Very often, users complain about mysterious sound problems that occur when the speakers are properly connected and the latest drivers are installed. There is sound when you turn on the computer, but it can turn off at any time. No regularity in the shutdown can be traced. For example, a user can quietly work at a computer for one or several days, and then the sound suddenly disappears. This problem is fixed by restarting Windows. But rebooting may not always be the best way out. Sometimes it is simply undesirable, and you can’t do without sound either. How, then, to adjust the sound?
Similar problems are observed in all versions of Windows 7. This is due to the Windows Audio service, which can turn off or freeze in case of hardware conflicts in the operating system. Because of this, the sound on the computer disappears. To check whether the service is connected or not, you need to open "Control Panel" => "All Control Panel Items" => "Administrative Tools" in sequence.
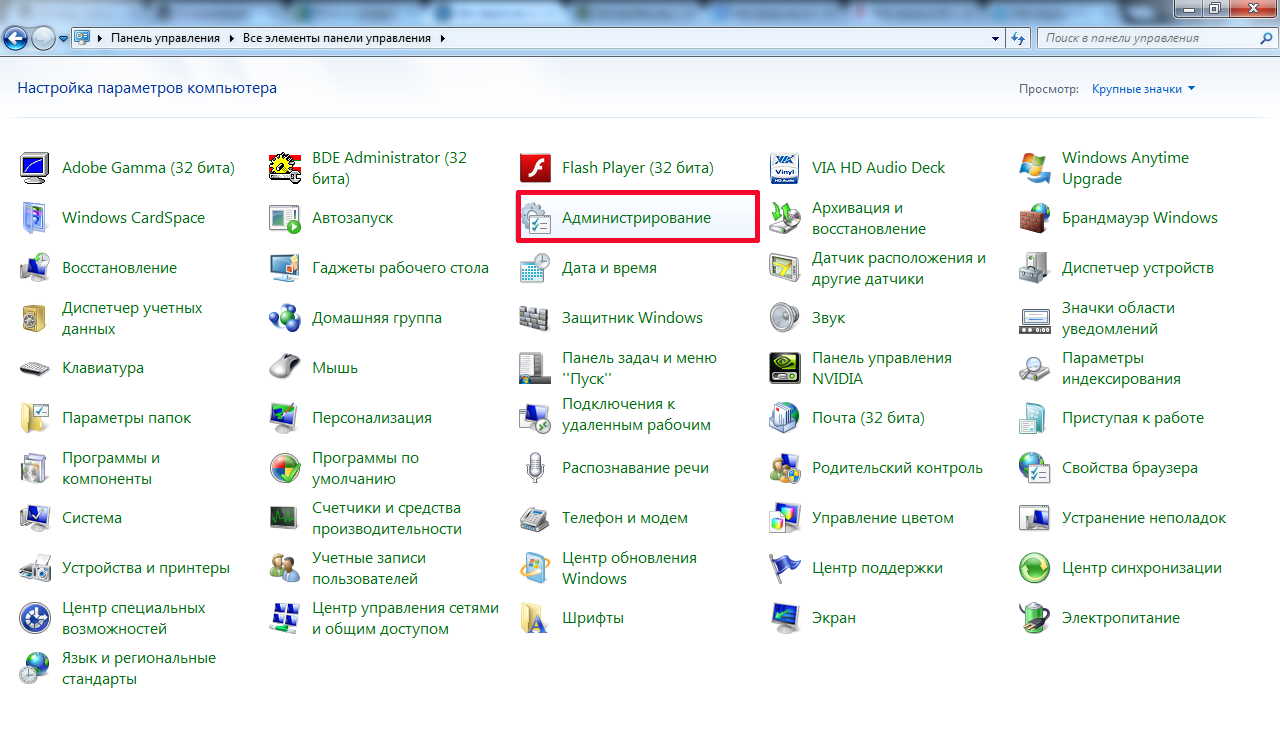
A window will appear in which select "Services".
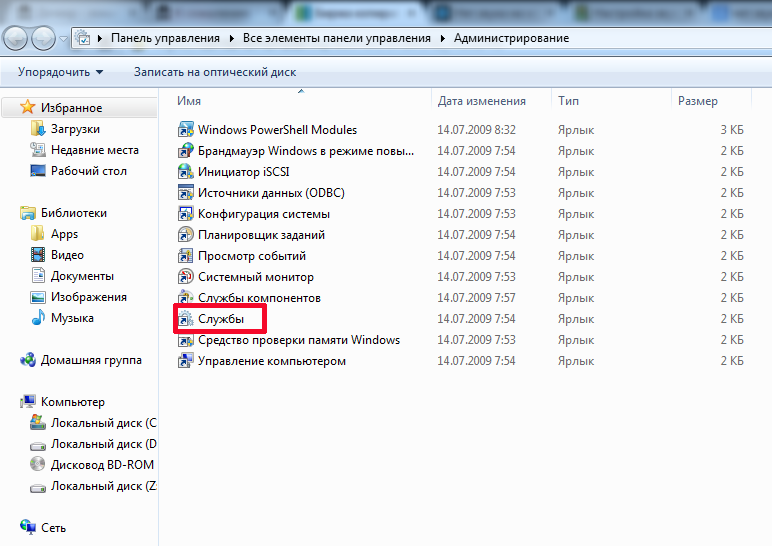
In the next window, you need to find the Windows Audio service and view its properties. For example, they could be:
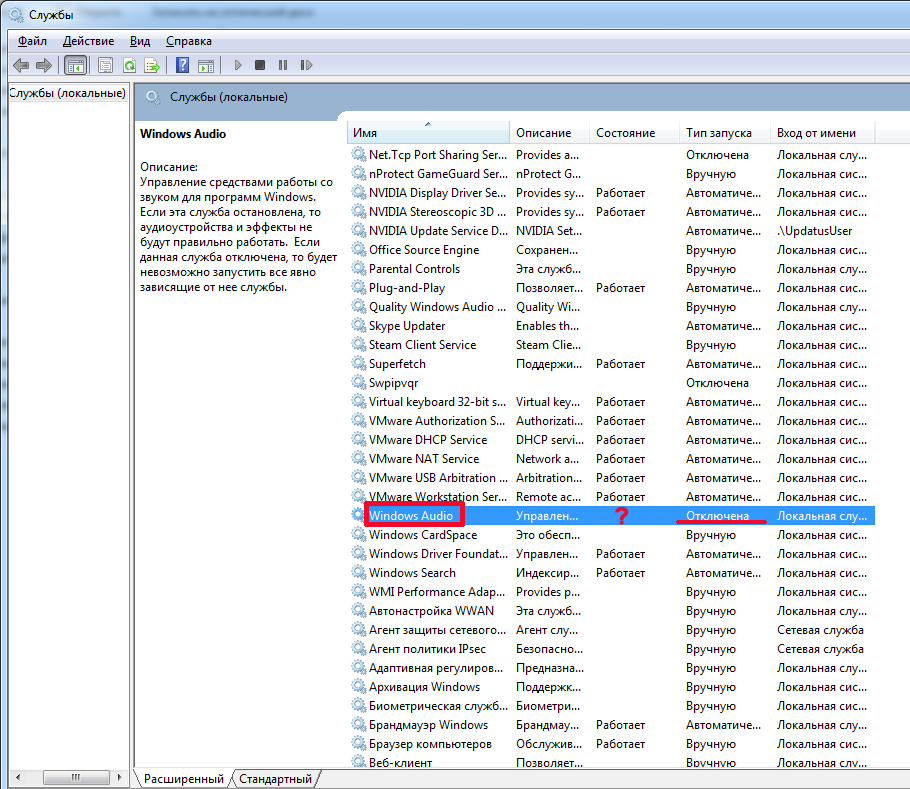
The screenshot shows that the "Status" column does not say that the service is running. In the "Startup type" column, it is generally disabled. No wonder there is no sound. Moreover, it will not appear even after a reboot, since such settings do not allow the service to start with the operating system. In order to set up the sound, you will have to perform two steps:
- Set up service start.
- Launch her.
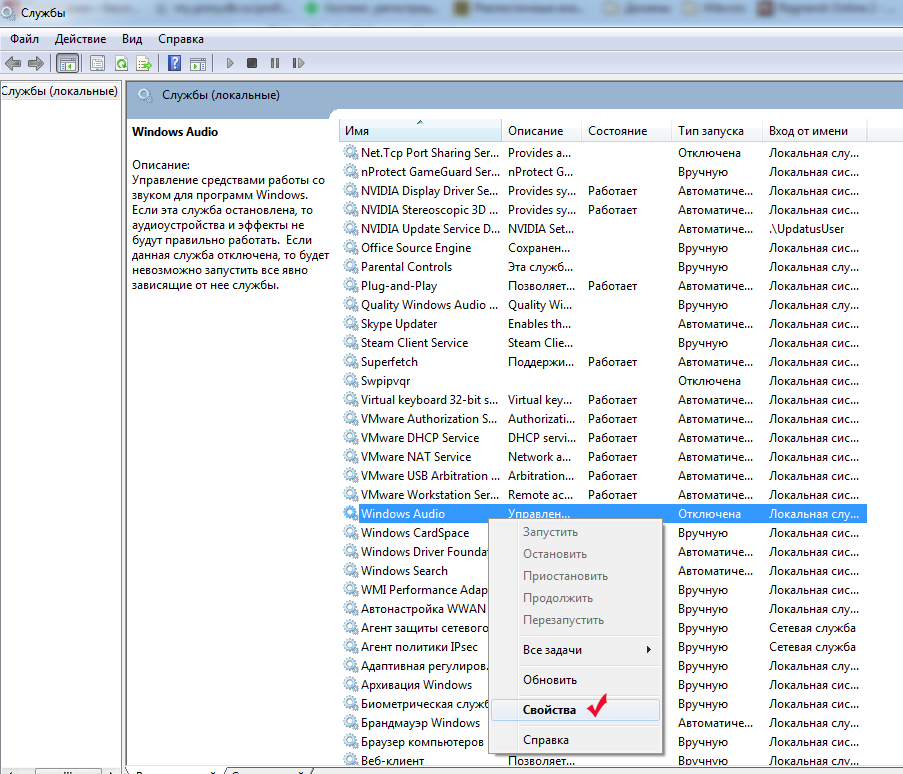
To configure the launch, right-click on the service and select "Properties".
In the settings window, in the "Startup type" item, you need to select "Automatic" instead of "Disabled". In this case, the service will automatically start with the operating system.
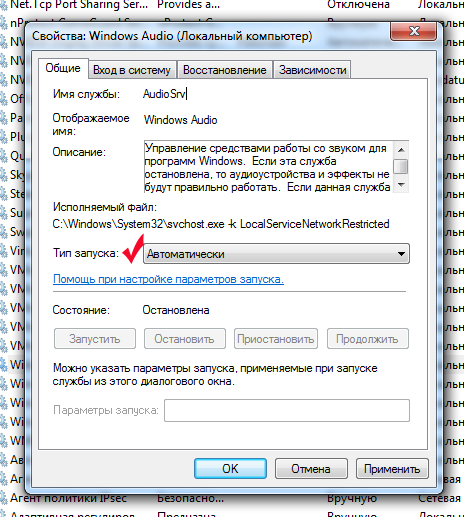
After selecting the startup type, the "Apply" and "OK" buttons are pressed. Now in the column "Startup type" you can see that the inscription "Disabled" has been replaced by the word "Automatic". Only then can you set up the audio connection. This is done by right-clicking on the service and selecting "Start".
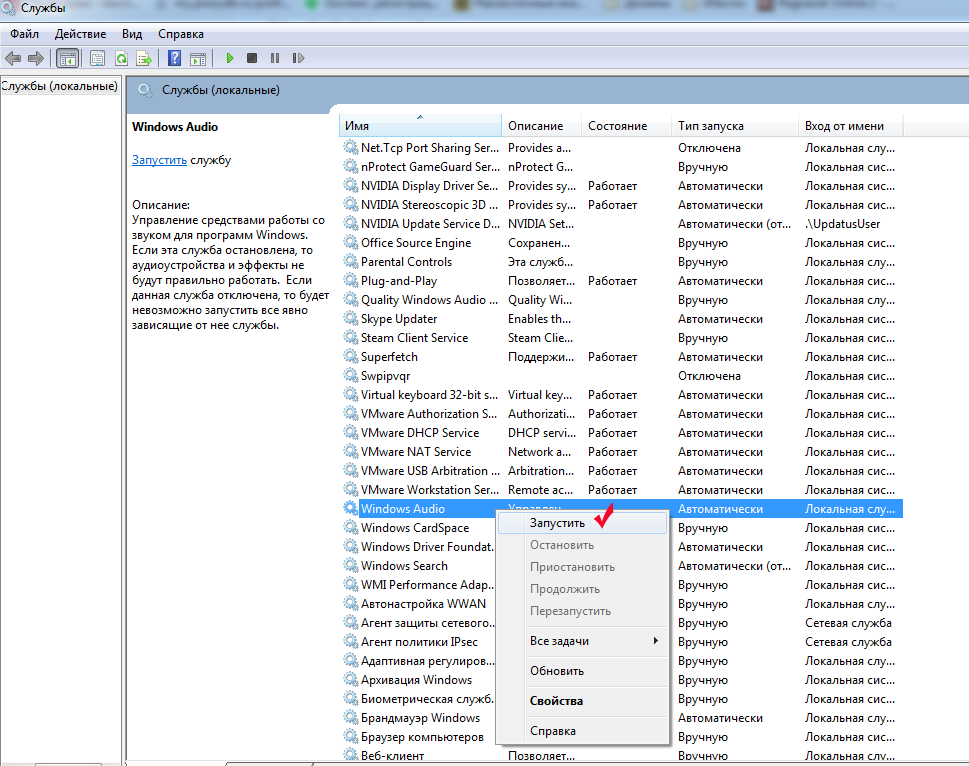
After all these steps, the problem should be resolved. It does not hurt to note that sometimes it says opposite the Windows Audio service that it is working, but there is still no sound on the computer. This may be due to a service hang. In this case, restarting it helps. To restart you need:
- right click on the service;
- select "Restart".
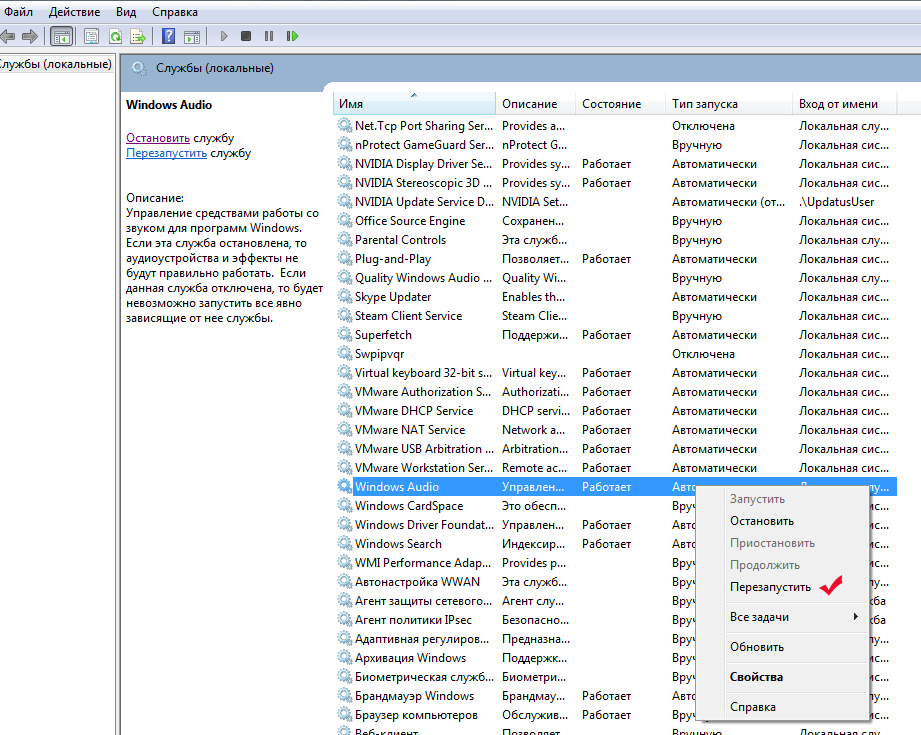
Restarting usually helps restore audio without restarting the computer.
After following these steps and checking for possible causes of the problem, you can easily adjust the sound on your computer.


