Greetings, dear visitor to the PenserMan blog! Who doesn't know what it is Windows 7 data archiving and came to this page to find out, I’ll explain. The concept of archiving means processing data for subsequent storage, and in relation to computer data, that is, its files, also transcoding and compression.
Why is this needed? Everything is very simple. In order to restore all our data in exactly the same form in which it was before in the event of a system failure. How to do this, what is needed for this and what you should pay attention to we will consider in this topic.
What do you need for this and where to start?
Well, first of all, you need to take care of the place where the data will be archived. It is best to have a separate external hard drive for this. Because if you use a Windows 7 disk, there is a high probability that after a “system disaster” the files of the archive itself will be damaged. That is, “don’t put all your eggs in one basket”!
Now let’s talk about where on the computer this archiving location is located. So, click “Start” then “Control Panel” and in the window that appears, select “Backup computer data”:
Or, if your “Setting parameters” window is not in the “Category” mode, but in the mode, for example, “Small icons”, then find “Backup and Restore” and click there:
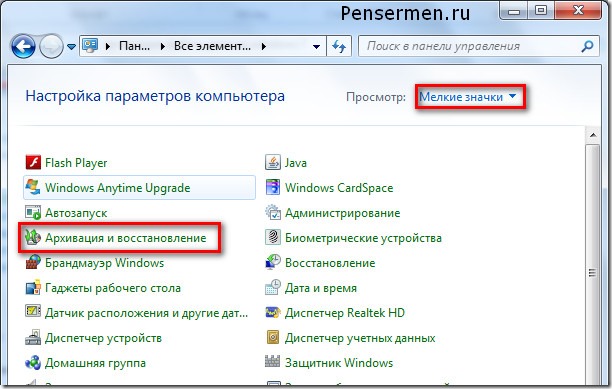
But regardless of the type of the top window, you will still end up in a window, which we will consider in the next section of our topic. I ask you not to be annoyed by “advanced” PC users about such a detailed description, but still, my blog is primarily intended for retirees and dummies.
Choosing an archive location
Above I already talked about which disk it should be placed on. To accurately indicate this, you need to do the following: Click on “Change settings”:
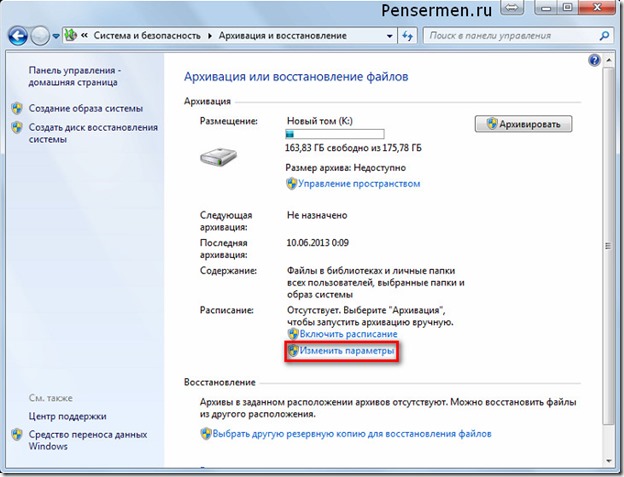
Don't be scared by the next window. This is not the beginning of the process yet, although for some reason it says “Start data archiving”, but at the top there is the inscription “Setting up archiving”:
Wait until the flashing green bar calms down and next select your external hard drive. In my case, it’s “GST-PENSERMAN (I:)”. Then click “Next”:
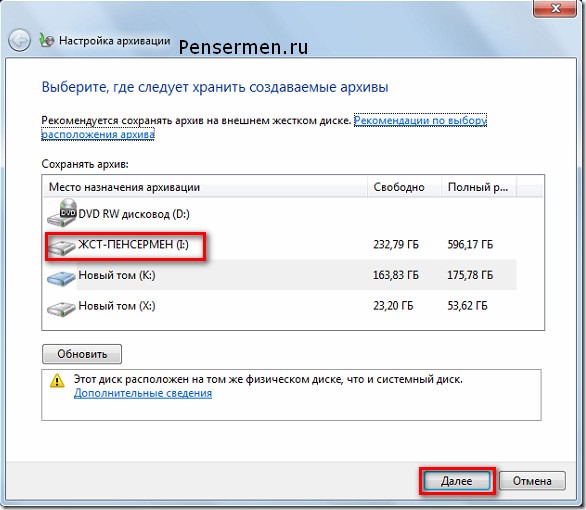
We are done with choosing the archiving location. Go ahead.
Selecting Archiving Objects
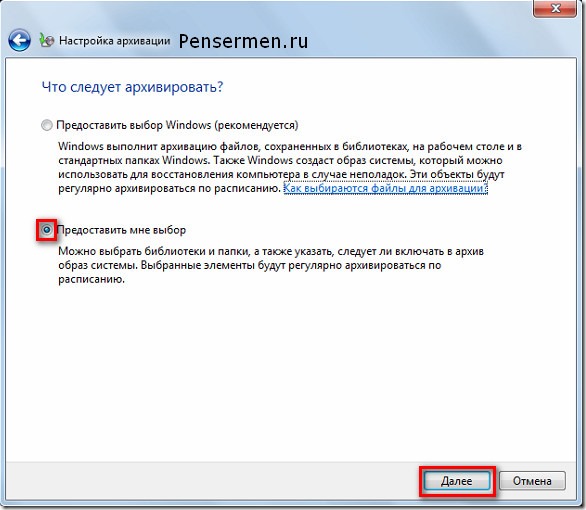
At the next stage of setup, we decide “What to archive?”. I advise you to put an end to “Give me a choice.” The fact is that if you give the choice to Windows, then the system disk will also be archived. This is of no use to us. I'll explain why later. This is the window:
After you clicked “Next” above, the following window will appear, where we are required to check the boxes where necessary. Of course, the inscriptions will be different for you and me, but their meaning will not change. First of all, you need to check the boxes in the places that are enclosed in red rectangles; the rest are at your discretion, but it’s better if you check there too:
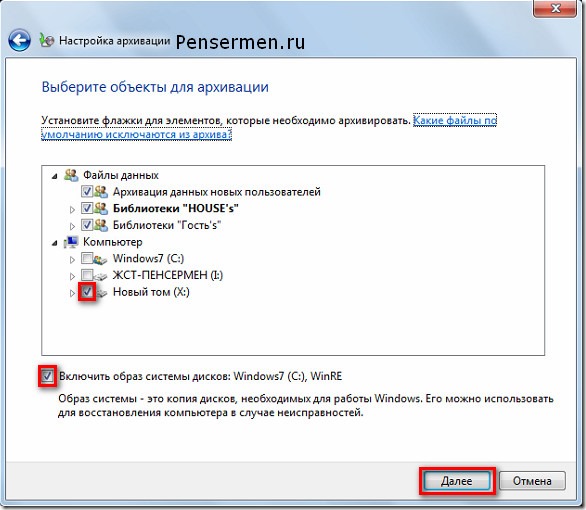
Let's figure out what all the above inscriptions mean.
- Archiving data of new users - this is if several users work on your computer.
- “HOUSE s” libraries are what are stored in the “My Documents” folder.
- “Guest s” libraries, if there is one, are when you provide the opportunity for strangers to work on your computer with limited rights.
- New volume (X:) is a logical disk on which there are no system files. Some may have several.
- Including a disk system image is what I talked about above when I suggested checking “Give me a choice.”
Regarding the last point, I hope you now understand that if we had checked “Give Windows a choice” at the very beginning, then the drive (C:) would have been backed up twice. And this is already unnecessary.
Now we need to decide how we will archive manually or automatically. Let's look at each of them.
Manual way to back up Windows 7 data
There is absolutely nothing complicated here. Again, as at the very beginning, go to Start/Control Panel/System and Security/Backup of computer data and get into the “Backup and Data” window. Here we click archive and the process begins:
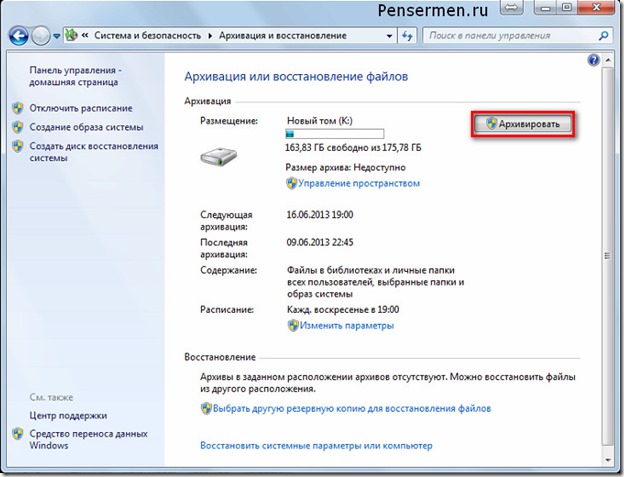
Just don't forget to connect an external hard drive. Although if you do not connect it, you will immediately see that the “Archive” button will not be active, that is, gray.
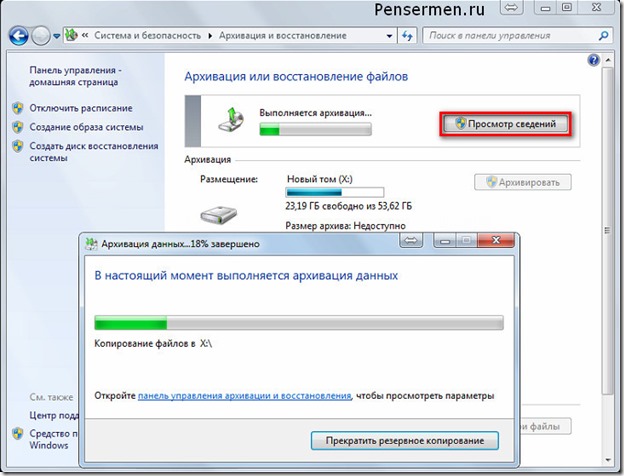
During the archiving process, you can monitor how the process is progressing. To do this, click on the “View information” button and an additional window will appear. There it will be written how many percent of archiving has already been completed and which files are being copied and to which disk. You can also stop the archiving process from there by clicking on “Stop backup”:
Of course, all this can be done automatically, if suddenly the need arises.
Automatic way to back up Windows 7 data
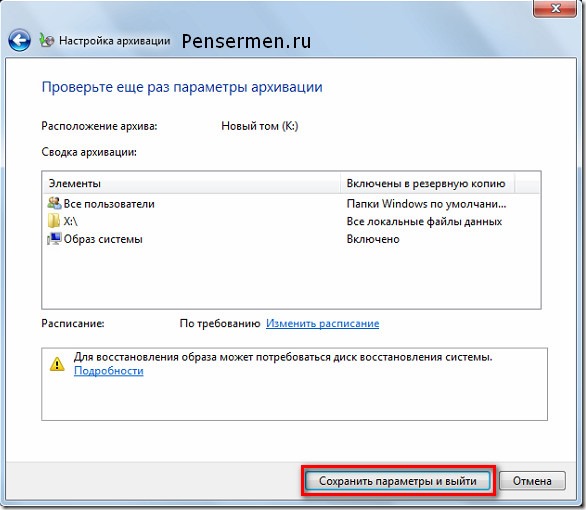
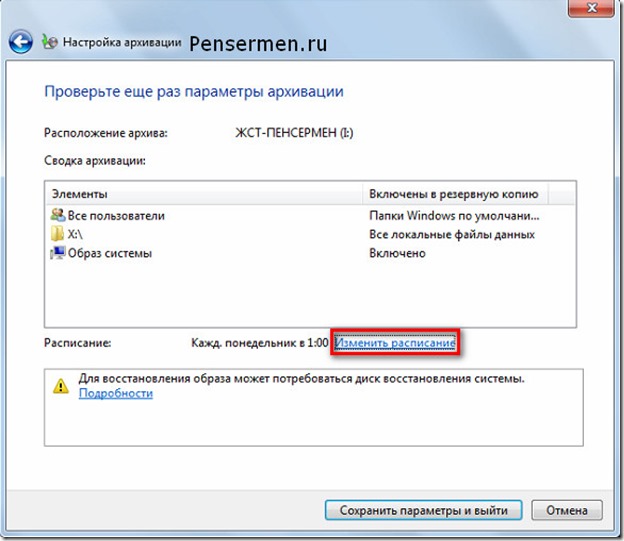
In order for backup to be carried out automatically, you need to make the necessary settings, and more specifically, you need to specify the start time. It is better to do this immediately after selecting archiving objects, in the last window, where we checked the archiving parameters again. Click “Change schedule”:
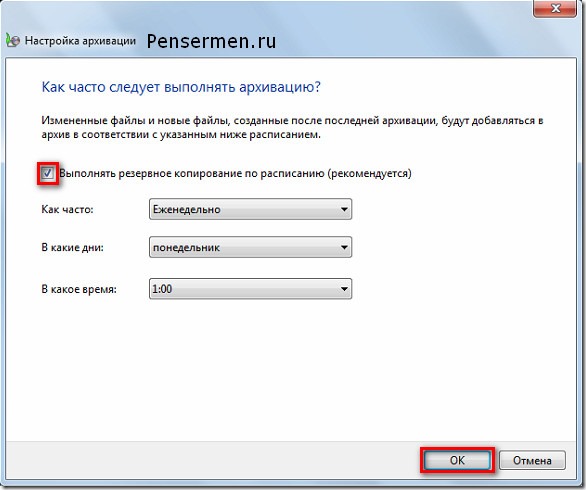
And here you indicate the time you think is necessary. I think every Monday at 1 am will be the most acceptable option. Of course, you can set the day of the week at your discretion, depending on when your data changes usually accumulate, but it’s better to choose the time at night. Still, the process is long and responsible, and it is better not to interfere with it at this moment:
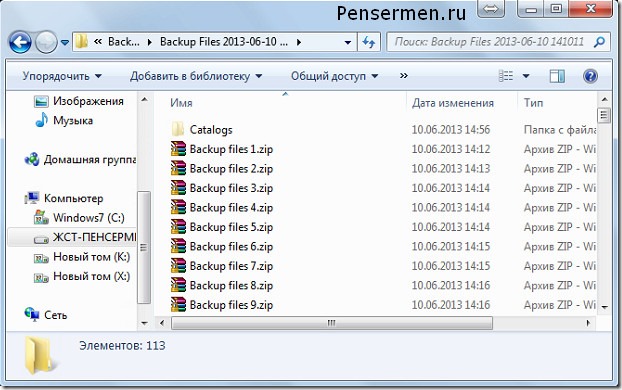
Then click “Save settings and exit”. Now, every time at the specified time, archiving of your data will automatically begin. Well, of course, unless you connect an external hard drive to your computer. This is what the archive itself looks like:
That's all about archiving Windows 7 data. Let's look at the next point.
Recovering data from an archive
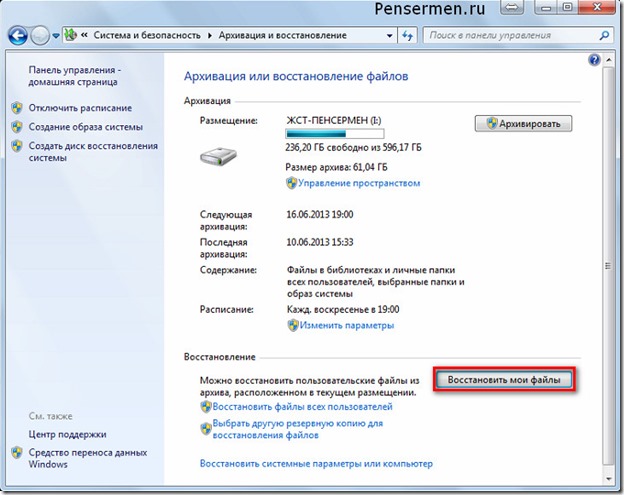
You can restore data from the archive either completely or partially. This is done as follows. We go to the main window of the archiver and click on the “Restore my files” button. This, of course, is not the only method of entering the recovery archive, but in my opinion the most convenient:
After this, the following window will open for us, where we must either find the folder or file we need through the “Search” button, or do the same through the browse:
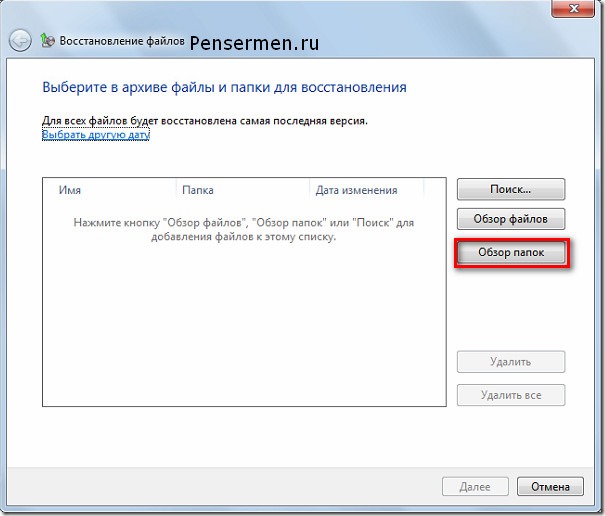
After clicking on “Browse Folder,” it usually takes about twenty seconds, or even more, until the next window appears. So don't be nervous and wait calmly. Then select what you need and click “Add folder”:
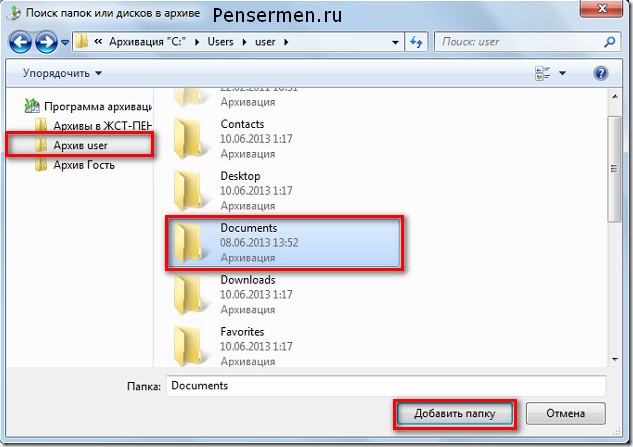
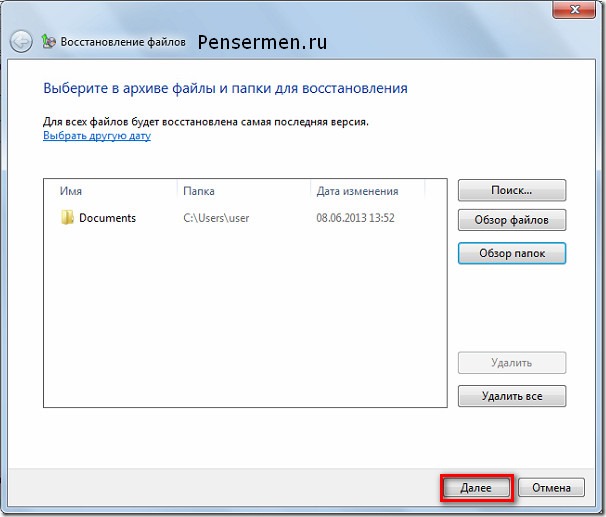
By the way, you can add more than one folder, but as many as you need. And if, for example, you need a folder that is located inside “Documents”, as in our case, then simply double-click with the left mouse button and so on until you find what you need. After this, the following window appears, where the added folder will be visible and we need to click “Next”:
In the following, select the location where you would like to restore this folder and click on “Restore”:
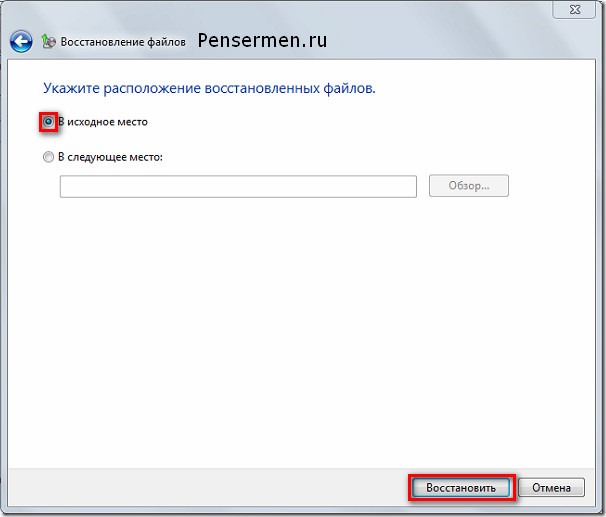
After all these manipulations, damaged or lost files or folders will be restored.
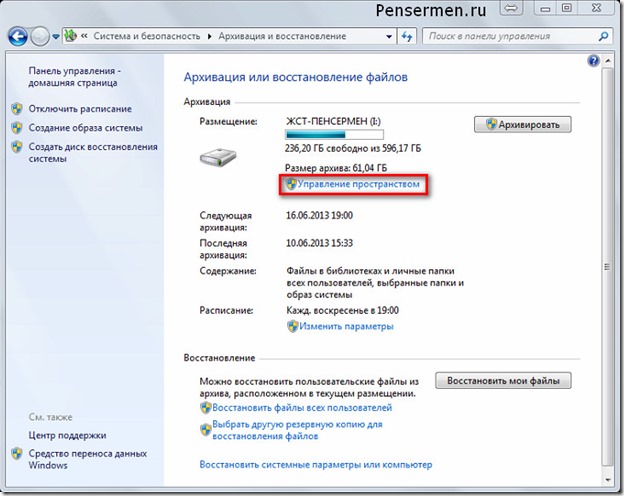
And the last point concerns the free space on your hard drive. Over time, more and more archives will be added and you need to keep track of this, especially when automatic data archiving is configured in Windows 7. Otherwise, you may not notice and hope that everything is archived, but it turns out not. To prevent this from happening, old unnecessary archives must be deleted. To do this, go to the main window of the archiver and click “Manage space”:
Well, there’s probably no need to show and describe further - everything is simple there. I think you can figure it out for yourself. But if you have any questions, comments are at your service. I will answer.
That's all I wanted to convey to you about such a wonderful instrument as Windows 7 data archiving. I hope you can use it. But I sincerely wish you that no system failures occur and that you do not have to restore data!
Good luck to you! See you soon on the pages of the Penserman blog.


