The Google Chrome browser has a parental control feature, which is implemented through managing a supervised profile. When using such parental controls in the browser, you can regulate your child's behavior on the Internet.
You can block access to all sites, except for sites included in the so-called “white list”, or block access only to some sites by compiling a list of unwanted resources on the Internet. This is how you will exercise parental control on the Internet.
Although parental controls are intended to be used by parents to monitor their children, a controlled profile can also be used for other purposes, such as preventing employees from accessing certain sites in the workplace.
This article will discuss the parental control function in the browser; this function is also available in many programs, for example, in the program. In addition to parental control, when using this program, you will forget about annoying advertising on website pages on the Internet.
To implement parental controls, you will need to create a Google Chrome browser, and then the created profile will need to be made controlled.
Creating a Controlled Profile
To do this, you will first need to sign in to your Google account. Then you will need to enter the browser settings by clicking on the “Customize and manage Google Chrome” button, and select “Settings” in the context menu.
After this, the “Settings” window will open. In this window, in the “Users” section, you will need to add a new user by clicking on the “Add new user” button.
The “Create a user account” window will open. In this window, you will first need to select an image and name for the new user. Then you should activate the item “Controlled user-managed profile” [email protected]", and then click on the "Create" button.
By default, the “Create a shortcut to this profile on the desktop” option is activated. After creating a new profile, you can launch a controlled Google Chrome browser profile from this shortcut.
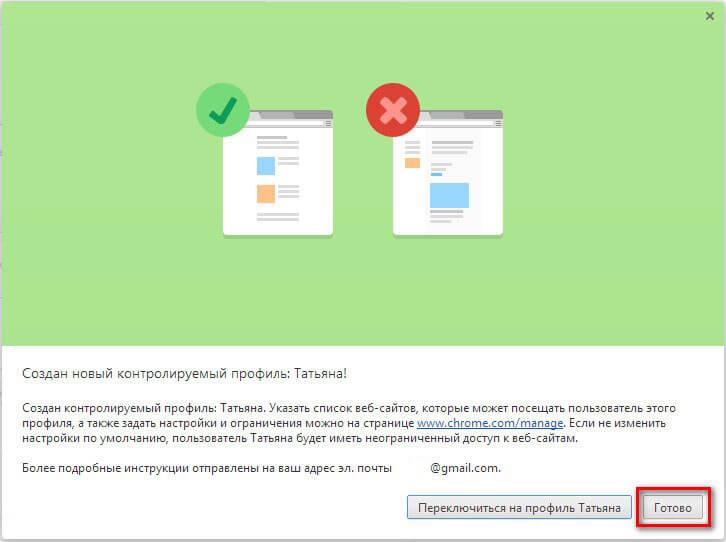
Next, a window will open in which you are notified that a new controlled profile has been created. A notification about the creation of a profile and how to use it will be sent to your email inbox. Click on the “Done” button in this window.
Now you can launch a browser with a controlled profile from a shortcut on the Desktop. A notice will be posted in the top left corner indicating that this profile is being monitored.
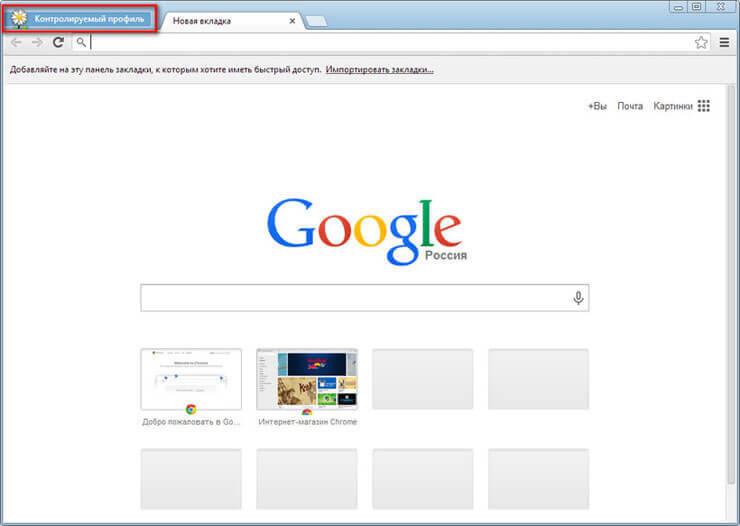
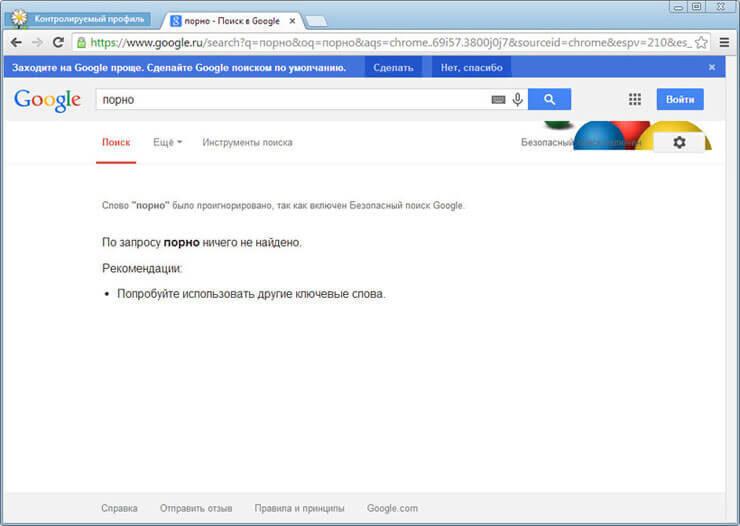
For a supervised profile under Chrome parental controls, Safe Search is enabled by default. When you enter certain queries in the Google Chrome browser, search results will not be shown.
For example, after entering the popular query “porn,” the browser showed nothing in the search engine results. This page says that the word "porn" was ignored because Google Safe Search was enabled.
Parental Control Settings
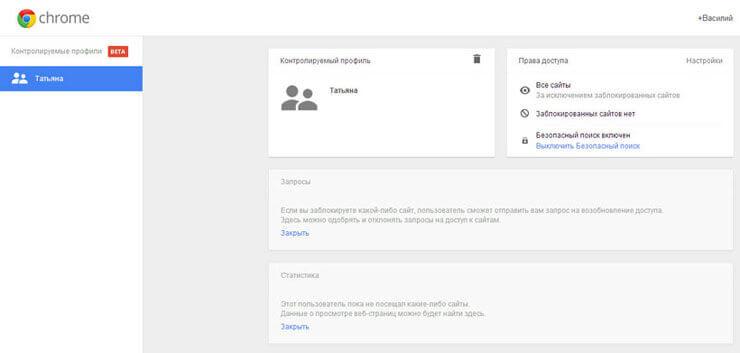
In order to enter the settings of the created controlled profile, you will need to log into the Google Chrome browser from the account of the user who created this controlled profile. Next, you will need to enter your browser settings, and on the “Settings” page, in the “Users” section, click on the “Profile Control Panel” link. After authorization, a page will open where you can configure access rights to sites on the Internet.
The page for managing your managed profile is located at www.chrome.com/manager.
In the Requests section, you can approve or deny access rights to specific sites. A user with a controlled profile can request access to a specific site. You can allow access to a blocked site by confirming the user’s request, or, conversely, reject the user’s request.
The “Statistics” section contains data about web browsing. Here you will see which sites the child visited, how many times these sites were visited, and also at what time these visits took place.
To further configure parental controls, you will need to click on the “Settings” button.
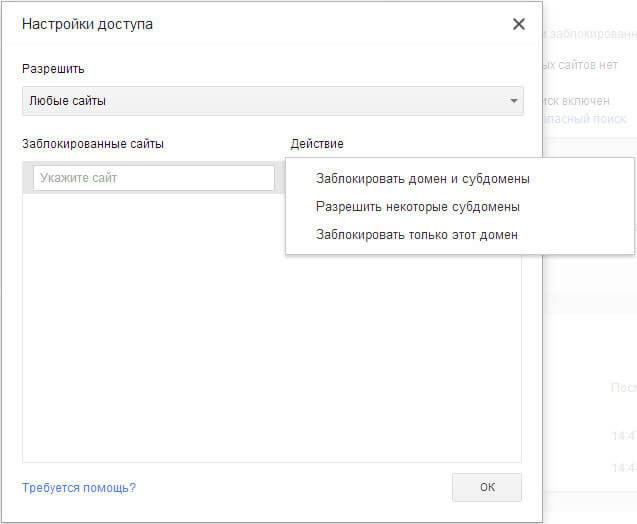
In the “Access Settings” window that opens, in the “Allow” section, you will need to select the order of access to sites. Here you can choose two ways to block sites.
- “Any sites” - all sites will be available, except blocked sites.
- “Only allowed sites” - only those sites that have been included in the “white list” will be accessible.
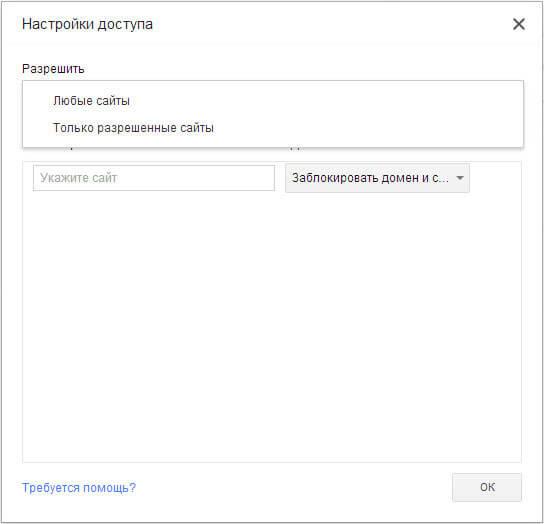
If you select the “Any sites” setting, you will need to add unwanted sites to the list of blocked sites. After adding a site to the blocked list, in the “Action” section you will need to select one of the following:
- “Block domain and subdomains.”
- "Allow some subdomains."
- “Block this domain only.”
By selecting these items, you can configure access rules for a specific domain and its subdomains by selecting the required option.
You will need to add sites without specifying the protocol (http://) before the site name. To do this, you will need to perform the following steps - first copy the site address, and then paste the address into the “Specify site” field. Next, remove the protocol name (http://) and other forward slashes from the site address.
When implementing parental controls in your browser, you can change the list of blocked or allowed sites by removing them from the list or adding new sites to the list.
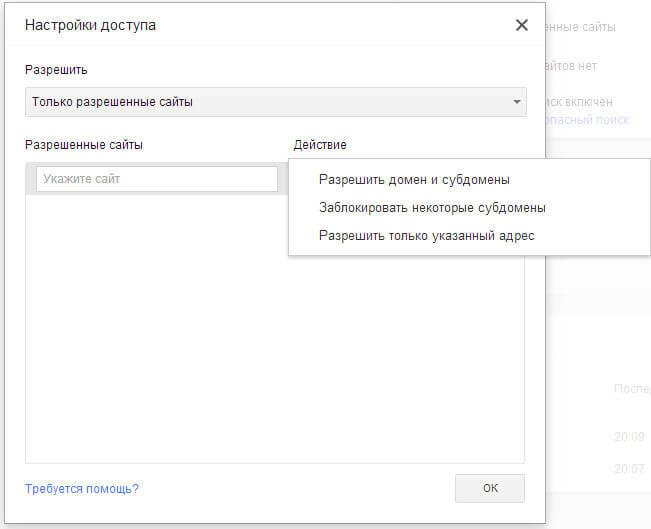
The second option - only “Allowed sites”, is a more strict version of parental controls in the Google Chrome browser. For a child or other supervised user, only authorized sites will be available. The list of such sites may be expanded upon request for permission.
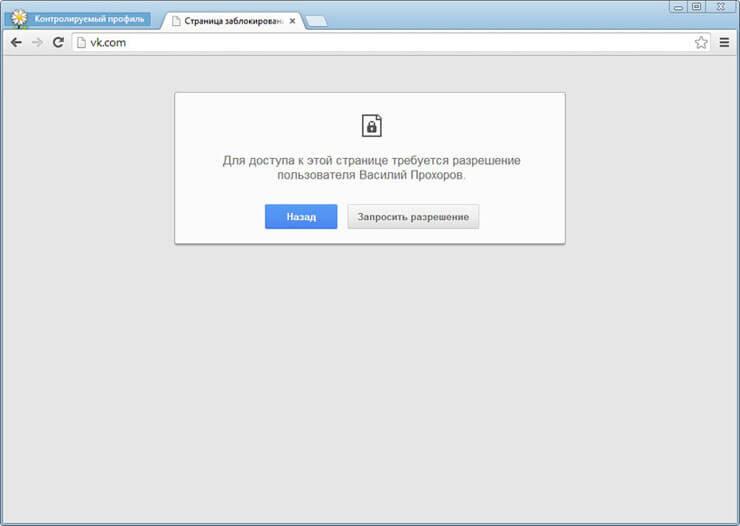
In this image, you can see that entering a web page requires permission, in this case mine, as the person who implements parental controls in the browser. To obtain permission to visit this web page, you will need to click on the “Request Visit” button.

On the “Access Settings” page, in the “Allow” section, select “Only allowed sites”, and add the addresses of allowed sites to the “Allowed sites” section. By selecting specific access rules for each in the “Actions” section.
- "Allow domain and subdomains."
- "Block some subdomains."
- "Allow only the specified address."
Using Parental Controls in Google Chrome
When you try to log into the VKontakte social networking site (vk.com), if access to this site is not allowed, you will see that the page will be blocked. To access a blocked page, you will be able to request permission by clicking on the “Request Permission” button. Otherwise, the user will have to return to the previous page of the browser because this page was blocked by the parental control function in Google Chrome.
On the controlled profile page, in the “Requests” section, you will see a request with the name of the site, in this case, it is the VKontakte site.

You can allow or deny this request by clicking the Allow or Deny buttons.

If you allow this request, then the user will be able to access all sites on vk.com.
From the “Statistics” section you can also regulate access rights to sites. Depending on the selected access rights: “any sites” or “only allowed sites”, you can allow or block a specific site. To do this, you first need to highlight the domain name and then click on the corresponding button.

Conclusions of the article
Parental controls in the Google Chrome browser, when using a controlled profile, allow you to restrict access to sites on the Internet. Parental controls in Chrome will allow you to control the behavior of your child as he travels across the World Wide Web.
Parental controls in Google Chrome (video)


